Student Login Announcement Tool
-
-
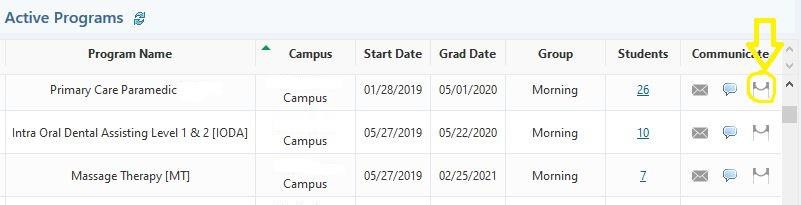
You can access the Student Login admin tool by clicking on the “Students” tab, then the “Dashboard” sub tab.
In the dashboard there is a column labelled Communicate In this column you will find an announcement icon.
-
You can click on the Announcement icon and you will be taken to the Student Login Announcement Tool.
-
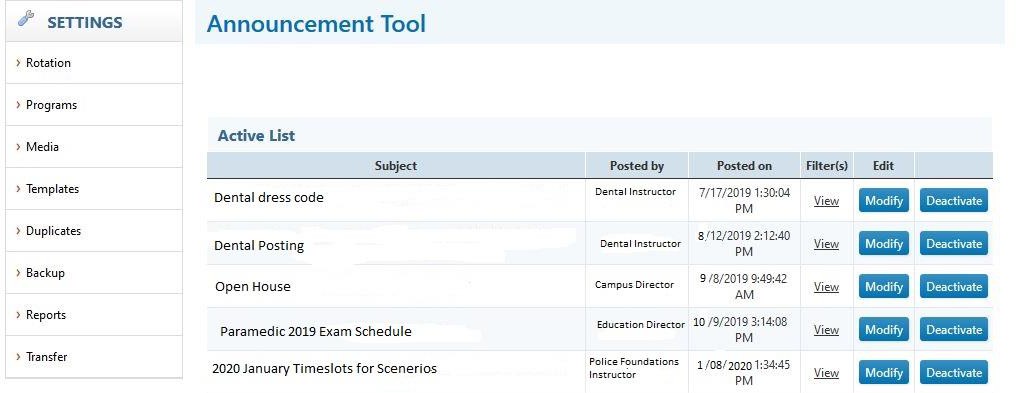
You can see all the active announcements that pertain to classes scheduled to you as well as any announcements that you have posted.
You will see: who they were posted by, the date they were posted and the filters that were used.
There are two buttons available as well. The modify button will allow you to enter the announcement and modify it.
The deactivate button will allow you to deactivate the announcement so that it is no longer visible to students.
-
Inactive Announcements
-
-
On the Announcement tool page, you will see heading called Inactive List. By clicking on the down arrow beside this heading a list of announcements created by yourself will appear.

-
Instructors will be able to activate only those announcements that they have created.
-
Creating New Announcements
-
-
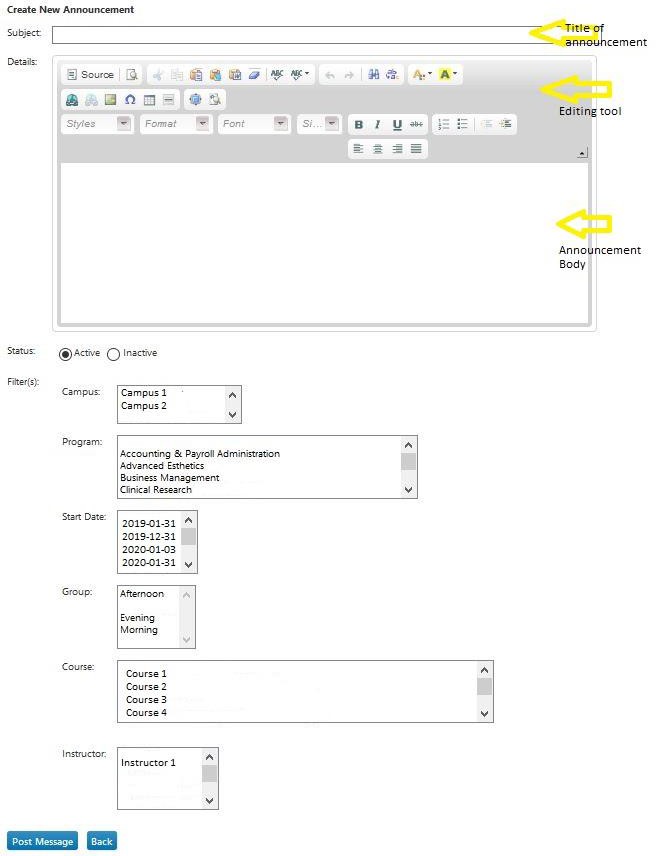
You can create announcements for your class by scrolling down to the bottom of the Announcement tool page.
-
Steps for creating your announcement:
-
Create your announcement title in the subject area
-
Create the body of your announcement.
-
Use the editing tools to create Titles and styles
-
Create a link to a document or webpage by using the link tool
-
Insert images by clicking on the image button
-
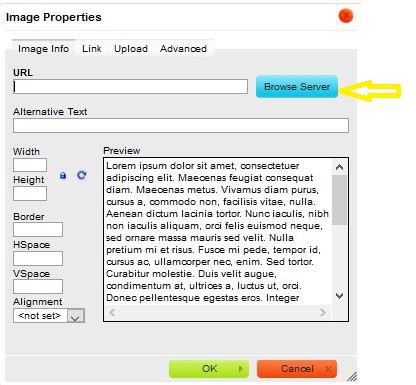
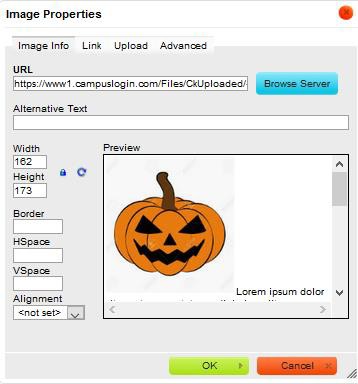
If the image is already on your school server click the browse server button and find the image on the school server
-
Double click on the selected image. You are able to edit the image properties (i.e. size) and hit ok to place it in your announcement
-
If the image is not on your server:
-
Click on the upload tab
-
Click on browse to find the image on your computer
-
Select the image from your computer and click on the send it to the server button
-
Size the image and then hit ok to place it into your announcement

-
-
You can also add links and tables by clicking on the correct icon and selecting your criteria.
-
You then can create filters to apply to your announcement.
-
-
-
-
-
-
-
-
-
-
If you teach at more than 1 campus you can select which campus(es) you wish to post to
-
You can select a program
-
You can select a scheduled start date
-
You can select a group
-
You can also select a particular course to post an announcement to.
In the example below, the course name is chosen in the first box. Once you choose the course you are wishing to post to, a list of the scheduled instances of this course appears, allowing you to choose the scheduled instance that you wish to post to.

-
Once your announcement is complete, you can then post it to the student login by clicking on the Post message blue button.
-
-
-
-
-
Speak to your Campus Manager or contact your CampusLogin account manager if you need any training or assistance using this tool.
CL-Students-Student-Login-Announcement-Tool-For-InstructorsDownload